
This is a step by step tutorial for installing your WordPress website local. It is good to test changes on your website or just to work on your website offline.
1. Install Local Webserver
First of all we need to turn your laptop into a webserver. So, you need to install for e.g. MAMP (available for Mac and Windows). Download the current version at https://www.mamp.info/en/downloads/ and install it.
2. Download Your Website
Connect to your webserver via FTP. If you don’t have a FTP-client yet install for e.g. filezilla from https://filezilla-project.org/ or use a web-FTP of your hoster, if he provides this. Save your website to the directory /Applications/MAMP/htdocs/*your-website*/.
If you never worked with filezilla – here a youtube video how this works: https://www.youtube.com/watch?v=O3DudpEMPiY
3. Download Your Database
Login to your hoster and go to your MySQL Database. Most hoster have PhpMyAdmin. Open this panel, select your database (not only one table!) and go to export.

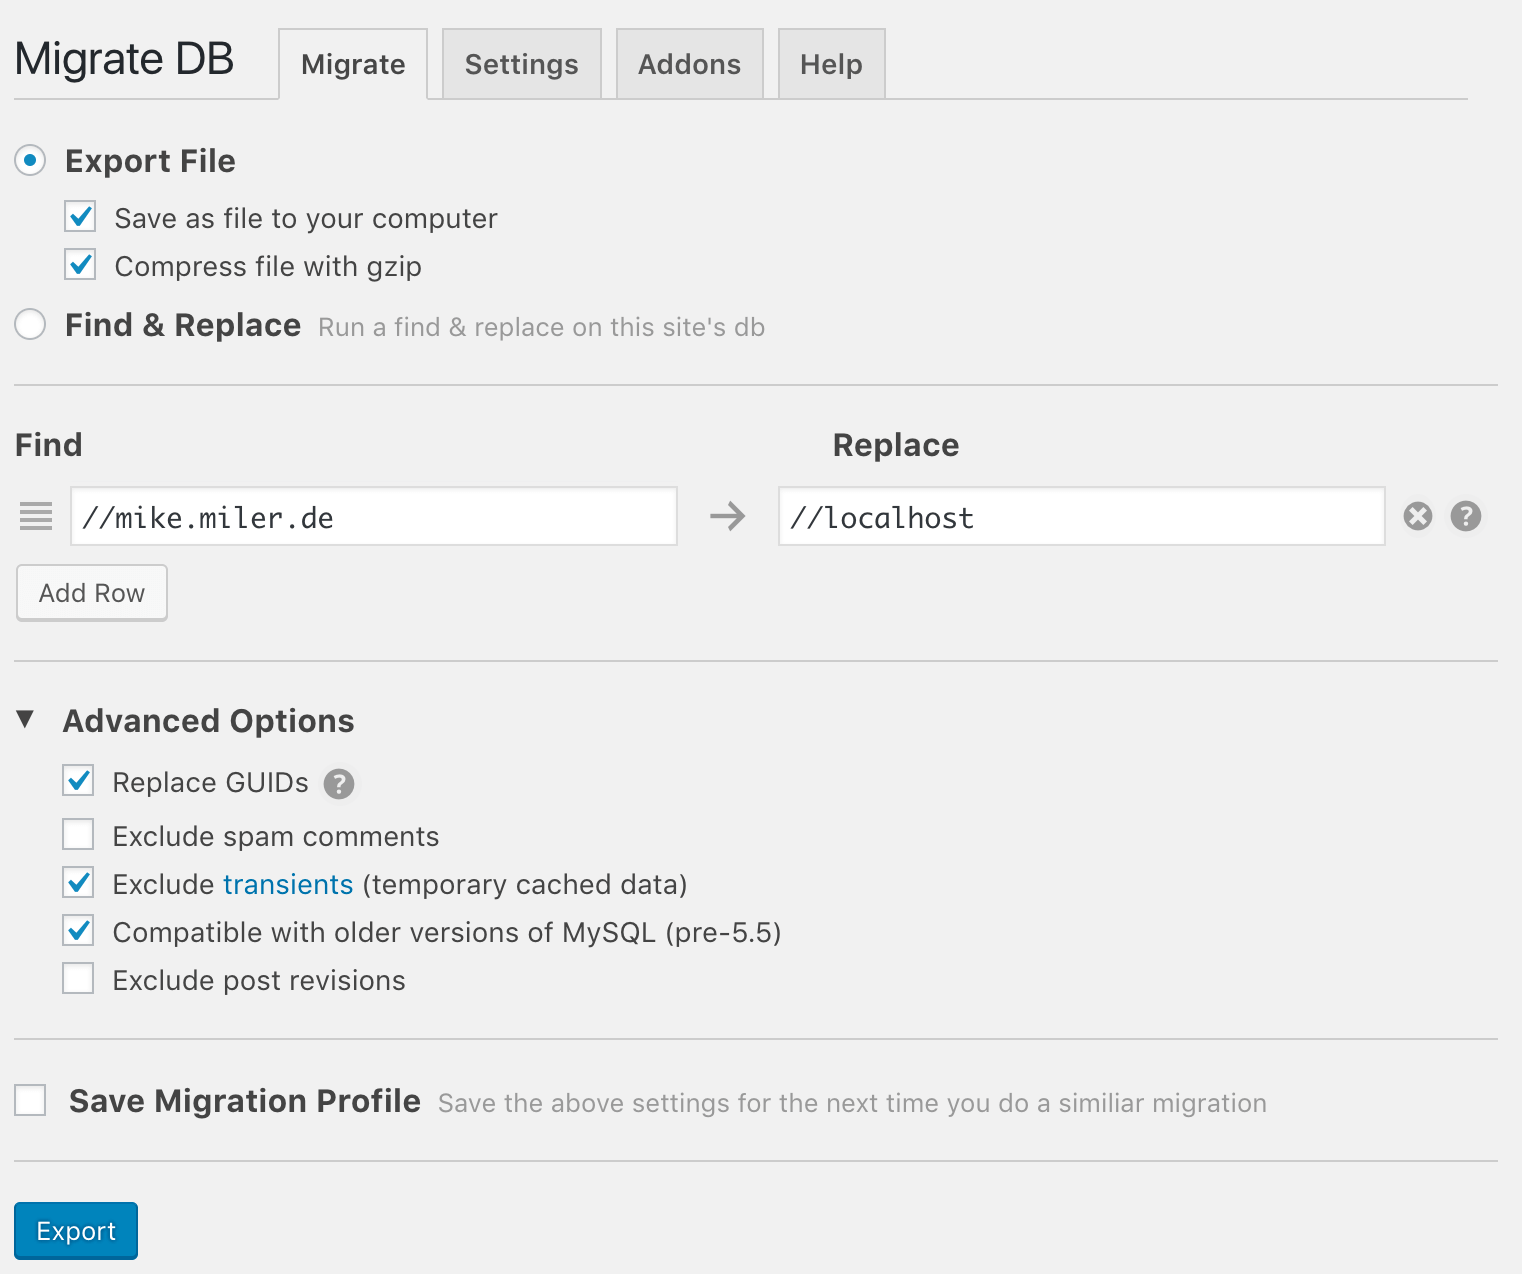
UPDATE: Michael just reminded me (tanks for that!) for an easier way to export your database and at the same time to replace the URL in the database (which also replaces step 6 of this tutorial):
Install the Plugin WP Migrate DB (https://wordpress.org/plugins/wp-migrate-db/) to your live website. You can export your database with this plugin and make replacements at the same time.
Your new URL for your local website using MAMP will be “localhost” (if you are good with this and don’t want to make it more complicated). Do the settings in WP Migrate DB like this:
4. Configuration of MAMP
Now you have everything you need to install your website local on your laptop.
4.1 Set Up The Web Server
First of all you set the Document Root. So the path to the files of your website. To do this, open MAMP, go to “Preferences” and select the Tab “Web Server”. Here you can select the folder, where you saved your website in step 2 and click “OK”.

4.2 Set Up The Database
Now you need to start the Servers by clicking on “Start Server”. To set up the database go to http://localhost/phpMyAdmin/?lang=en. Does this look familiar? Here you have your local phpMyAdmin Panel. What you do now is to create a new database:
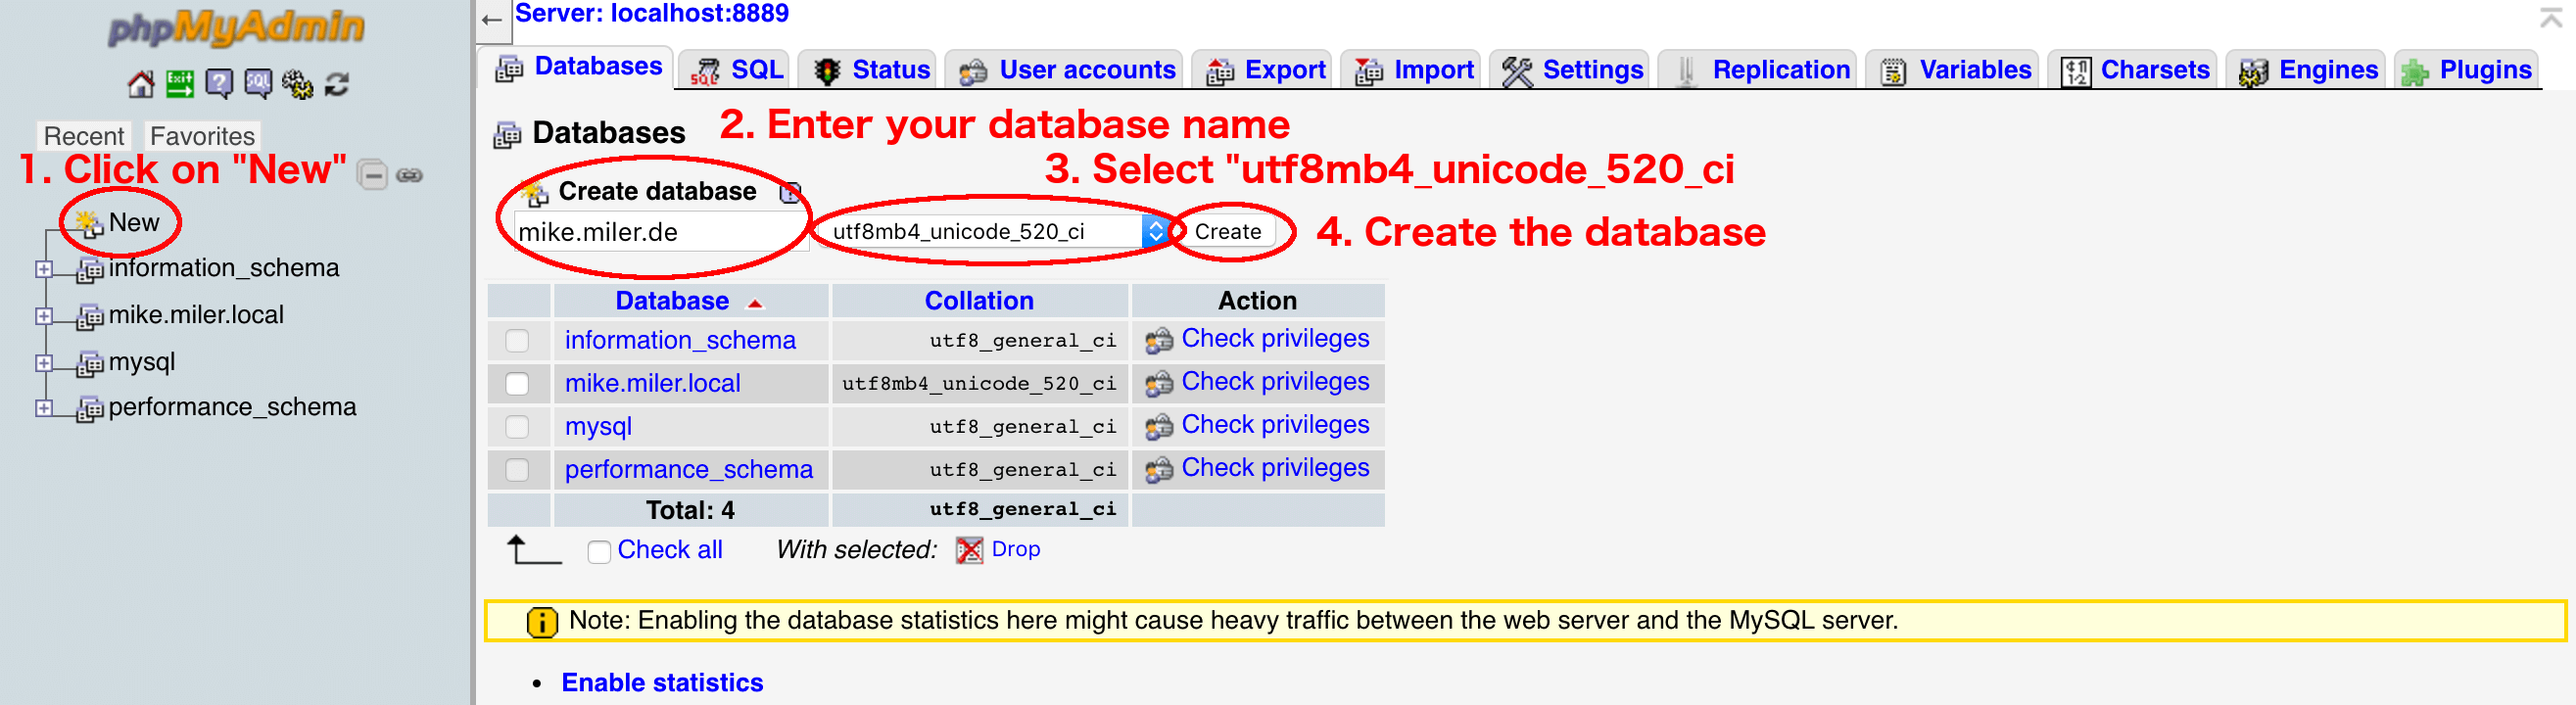
Now you have your new, empty database. All you have to do now is selecting the new database on the left side, go to the tab “Import”. Select your downloaded database and upload it.
5. Connect your website with the database
Now you need to connect your website to your new database. Open the file “wp-config.php” in your website folder and change the following lines:
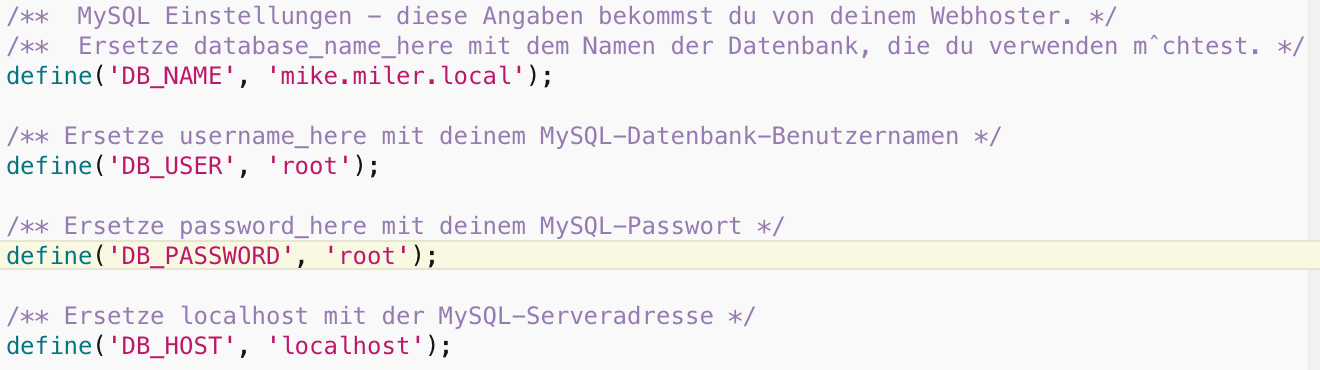
Replace “mike.miler.local” with the database name you entered in step 4.2. The other three settings are the default settings of MAMP you can use.
6. Set Up Your Domain
Now your website is available at the domain “localhost”. Almost. Your website is not set up for the domain “localhost” but for – in my case – wp-mike.com. You you will be redirected to your domain if you enter “localhost” in your browser.
There are a few ways how you can fix this. I will explain the – for me – easiest way:
To replace the URL of your live-website to “localhost” for your local website, download the tool https://interconnectit.com/products/search-and-replace-for-wordpress-databases/, unzip the file and copy the folder to your local WordPress folder. Now go to localhost/Search-Replace-DB-master . With this tool you can replace strings in your whole database. Be very careful with this tool and double-check the things you do here!
Now you can replace the URL from your live website with “localhost” by entering the URLs to the “replace” and “with” fields:

You can leave the other fields like they are. If you want to check the replacements before they are replaced in your database, click on “dry run” and you see the changes which will be made in a live run.
UPDATE: You don’t need step 6 if you did the replacements already with the plugin WP Migrate DB in step 3.
7. Done
Now your website should be offline available. You can reach it at http://localhost.